
Eight years ago today, we were married underneath a beautiful quilt. It was a collaborative project that was contributed to by over 150 people. On our one year wedding anniversary I shared photos of the finished quilt along with some photos from our wedding.
Recently, I realized that I have not shared the details behind the physical construction and I thought it was time to do that.
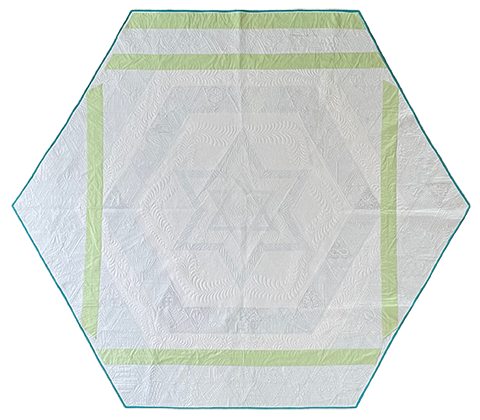
This is the back of the quilt. It has 5 sleeves. The top sleeve is so that it could be hung vertically at our reception. The other 4 sleeves were placed to make the largest square possible for hanging it above our heads during the ceremony. If you make a square or rectangular huppah, you'd only need 4 sleeves, one for each side. The square in my huppah is just under 6' by 6' which was the recommended size from my rabbi.
This photo shows how we had it hung during the ceremony. It was held up by 4 vertical poles and 4 horizontal poles. I made pole covers from navy fabric and created triangular pyramid bases from navy fabric to cover up the sand bags that were holding the poles in place. We were outside and I wanted to make sure that wind wouldn't be an issue. We did a couple test runs ahead of the wedding to make sure that everything would work out as planned. Here is a link to similar stands.
 |
| Photo by Donna Von Bruening |
Here I am a couple hours before the wedding going over the assembly process. I had planned on setting it up myself because at the time it seemed easier than explaining it to others. I'll admit in hindsight that it was a bit crazy to have thought that.
I ended up entrusting the process to two amazing quilters and their husbands. I knew that they would take great care to make sure it was perfect. Jessica Levitt, Susan DiBartolo, and their spouses put it all together on my wedding day shortly after this photo was taken. My brother, Brad, then hooked up a GoPro in the corner to capture a unique video angle of the ceremony.

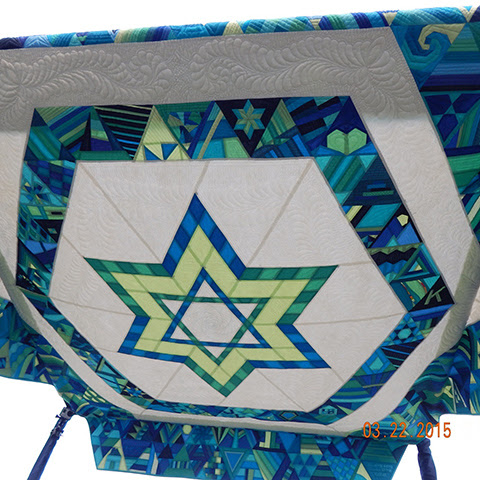
This is a photo of the full quilt. We hung it with the designs facing down and we could see almost all of the blocks during our ceremony. I picked the light color background and yellow star color knowing that it would look like stained glass from below. The finished quilt is 96" tall by 111" wide from point to point.

The quilt is composed of 6.5" unfinished, 6" finished height triangles.

I pieced the center myself. I did not write a pattern for the quilt and don't plan on it. This is a personal, family heirloom quilt I made just for my family. It was quilted by Angela Walters of Quilting is My Therapy.


It was hung vertical at our reception and made for a great backdrop.

Here's the blog post where we made: The original "call" for blocks to be made. Check that out to learn more about how the process began.
These are the Kona Cotton Solid colors that were used in the quilt blocks. This color variety ended up being a great option for the wedding all around because it gave us a lot of depth, interest, and variety to work when it came to selecting all of the different finishes and decor for the day.

I hope you enjoyed that trip down memory lane! Hopefully, it was helpful for everyone looking to make their own heirloom huppah this coming wedding season.

© Blog post written by Julie Herman
For more information visit http://www.jaybirdquilts.com/
2 comments:
It was such a privilege to make blocks for this amazing piece. And so fun at the reception as we all pointed out to each other which ones we made!
This is so special and lovely! What a wonderful idea that was perfectly executed. May you have a joyful life together. <3
Post a Comment