
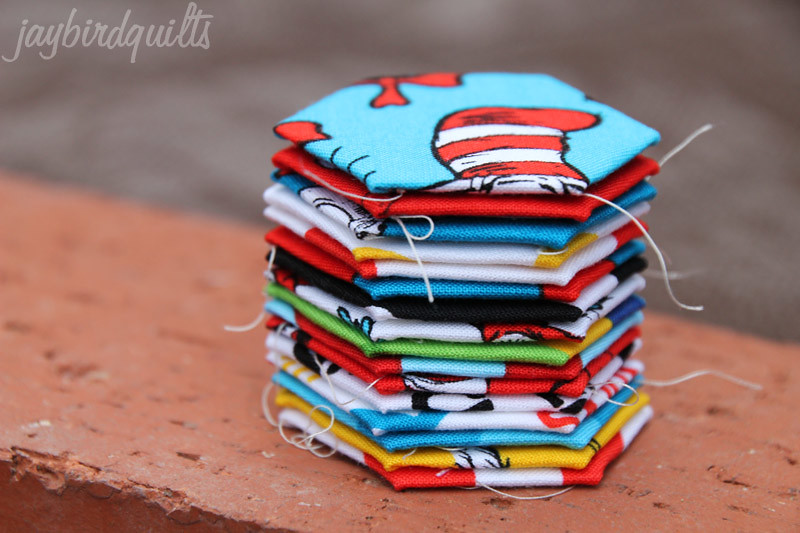
fabrics are from Celebrate Seuss! and The Cat in the Hat fabric collections

hand sewing hexagons tutorial! {part 1}
{as promised}
Below are step by step directions with photos of how to baste fabric around a hexagon template. This tutorial will continue in part #2 with attaching the hexagons together. Part #3 will provide info on removing the plastic quilt patis and one finishing option.
{Directions are written for right handed people... if you sew left handed you'll have to reverse a a few steps.}
Supplies.
1. Quilt Patis Hexagon Templates or paper templates {I use 1" ones here}
2. Fabric scraps
3. Thread {I use Aurifil}
4. Hand sewing needle
5. Scissors
6. Thin straight pins
7. Accuquilt Go! Cutter {optional}
my go to needles for almost everything


1. Most people use paper templates. These can be purchased or made on your own. While making them on your own seems like a great money saver.. they can be found very inexpensively and it takes a good amount of time to cut them yourself... especially accurately.
Where to buy?
Natalie has the giant 3" ones in her shop
Kerri has a variety of sizes in her shop
2. You will see in the photos below that I use Quilt Patis Hexagon Templates. I prefer the plastic ones for a few reasons. They are stiffer and hold fabric around hexagon shape very well.
3. You can use both together! {See photo above}
4. If you are using my tutorial below with paper templates... I suggest to punch a hole in the middle to follow along.
5. Last thing... you'll see below that I baste my hexagons on the back and not through the template. I always do it this way with the plastic ones... and usually do it this way with the smaller sizes of paper ones. In the photo below I was working with 3" paper templates and I based through the paper.

fabrics are...
Urban Zoologie by Ann Kelle {available now}
Urban Circus by Laurie Wisbrun {available in august}
both from robert kaufman
Cutting
Use your accuquilt go! to cut out hexagons in the size needed for your project. For this I cut the medium size hexagons and used 1" templates. {Note that 1" refers to the size of one side of the hexagon, not the widest part.}

Here is a photo to show you how big the hexagons are before basting around the plastic and after.

{ If you don't have an accuquilt go! you can use your templates as a guide to cut your fabric. }

Basting
Basting is defined as loose stitches that are temporary to hold fabric in place. Usually this refers to the sandwich of fabric-batting-fabric when preparing to quilt a quilt sandwich. In this case when I say "Basting" I'm referring to the temporary stitches used to hold fabric around a hexagon template. {Don't make your stitches "loose" for this project}1. Use a straight pin to grab just a few threads of fabric and hold the plastic template in place. Thread your hand sewing needle with no more than 18" of thread.

2. Start with one side and finger press the fabric over the plastic template.

3. Fold over the next side and use your left thump to hold in place.


4. Use your threaded needle to take a small stitch through both folded sides at the corner without being too close to the actual corner. Take a second stitch in the same place.

5. Turning counterclockwise fold over the next side.

6. Repeat step #4

7. Continue to repeat the process of folding sides down and basting at the corners all the way around the hexagon.

8. Remove the straight pin once four corners are based. Sew the last two corners. You can do a simple knot at the last corner or take a few extra stitches. Both will hold the basting stitches in place for a while!

In part 2 I'll show you how to sew them together!

happy stitching!!
--
want to link to this tutorial?
grab a button!

{144 x 144}

{250x250}
enjoy!!
© 2009-2022 Julie R. Herman. All rights reserved.
No part of this tutorial may be reproduced without written consent of Jaybird Quilts.
26 comments:
Great tutorial Julie - thank you!
Great info, thanks! Looking forward to part 2.
Thanks for the tutorial! Great directions!
Lani
Thank you thank you thank you!!! I plan on cutting some templates tonight with my (hardly ever used) cricut so I can take a whole bunch to the beach! Great tutorial. Now it's crystal clear!
I love to take my hexagon's with me everywhere I have to wait, dr's office, car repair, school picking up kids, soccer games, stop lights lol!
Great tutorial, love the fabric!
Love the tutorial Julie, I also like to make them without going through the paper. The Dr Seuss hexies are just to cute, ideas simmering here!
what size plastic did you use from quilt patis? they list four different sizes on their website {1/2", 3/4", 1", 1 1/2"}.
joonzeboo at gmail dot com
thank u so much for this fab tutorial!!!
I use quilt patis, too, and absolutely love them!
Excellent tutorial. I am always trying to explain to others how to make the hexagons. Now I can send them to your great site for visuals.
Thanks
Sharon
Thanks for the 1st lesson. I just ordered the Quilt Patis template online so I will print out your tutorial to follow after they arrive. One of my favorite heirloom quilts made by my grandmother was a hexagon flower quilt, always one of my favorites.
Great tutorial! I love the Dr Seuss!!
You DIDN'T forget!;)
Thanks kiddo....we have paper ones at our shop...I'll have to get some and cut myself some fabric and make a little baggie of them to take to the beach next month!! By that time you'll have posted the next part...whooohoooooo...what fabric to use...what fabric to use?
I'm thinking scrapy!!;)
I've been making them all summer too, I'm not sure what I'll do with them just yet but having me some fun.
Ok - trying not to sound dumb...but can these be done by machine rather than hand-sewn? If so...where would I find a tutorial for that? Just curious...I might actually enjoy the hand sewing. Thanks for the tutorial. I am wanting to try this.
Great tutorial! I have put it in my favs, hexies are on my list to do!
Thank you for this really good tutorial ... this is the best one yet as I think I could actually accomplish this one and I really want to attempt the hexies again. Thanks!
Fun tutorial. I found your blog on Vicki's fiber field trip. WHere can I get that Dr. Seuss fabric?!?
Thank you for using my Quilt Patis! I love your Dr. Seuss hexies, they will make a great kids quilt.
I found you through a link on SewSweetness.com and THANK YOU for posting how to use the plastic templates! I admit I was completely confused. I am going to try using them next time I need to make hexies. Which will be soon, I recently taught myself how to do so and love it.
Looking at this now, I believe that I have done it completely different - the basting, I mean. I will now try it this way. Thank you for the great tutorial. I am hooked on hexies :)
Thank you for the great tutorial. Looking at this now, I have done it completely different and will try your way of basting. I use paper pieces. I am hooked on hexies! :)
I cannot thank you enough for this tutorial. I'm fairly new to sewing and this is my first time using hexagons. When I read my pattern instructions I still couldn't figure out what I was supposed to do. I searched several hexagon tutorials, and in my opinion, yours is by far the best. It made the instructions in my pattern make sense, and I really appreciate the detailed step-by-step photos. THANK YOU, THANK YOU, THANK YOU!!!
Thank you so much!
I am whittling away at my hopefully colorwash hexagon quilt. Honestly would never have had the inspiration without your tutorial! Best
Denise
https://scontent-b.xx.fbcdn.net/hphotos-ash3/t1/1535731_10151810328680986_1528792107_n.jpg
I print mine on inkjet and laser paper (24 lb) available at Walmart using program at www.incompetech.com. You can print any size hexes you want. Then I staple about 4-5 more sheets on the back and cut them out. They are stiff enough to hold the shape and last for a lot of uses before they get too soft. Pin to my fabric with a pin on the right side and proceed as in your great tute.
I am doing a scrappy 1" thing now but have run into a problem. It is about 4' wide now but four sides have 16 hexes and two have 14 hexes and I am trying to figure out how to make it symmetrical. Any suggestions? Nancy
Thanks so much.....Nan
Post a Comment